Controlling What Gets Tagged
Category filters, discipline filters, linked models, and scopes.
Last updated: 2024-12-01
Three factors determine what Autotag actually tags: your active profile, the current view/selection scope, and the filters you configure within the profile. This page focuses on the filter controls that let you precisely target which elements receive tags.
Category Selection
The profile editor organizes settings by discipline (Mechanical, Electrical, Plumbing) and category (Ducts, Pipes, Equipment, etc.). Each category you enable will be considered for tagging.
Element Type Filter
Use the Element Type filter to tag only specific family types within a category. For example, tag only certain pipe types while ignoring others.
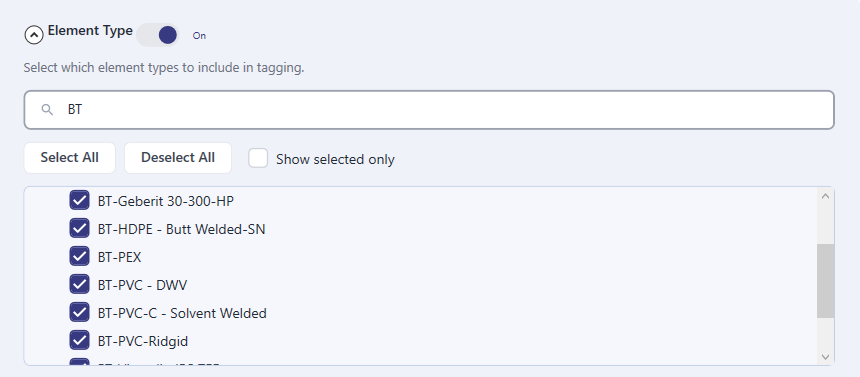
- Check the types you want to tag
- Unchecked types are ignored even if visible in the view
- Useful for excluding temporary or placeholder families
System Type Filter
System Type filtering lets you target specific MEP system classifications. Tag only Supply Air ducts, or only Sanitary pipes, without affecting other systems.
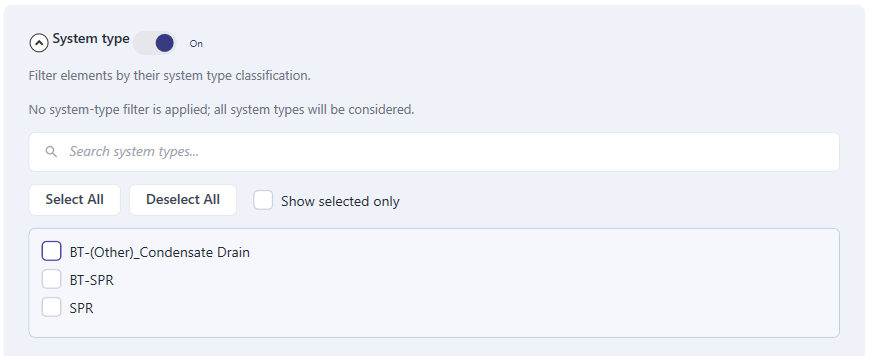
- Works with Revit's built-in system classifications
- Combine with Element Type for precise targeting
- Great for discipline-specific tagging profiles
Revit Filters Integration
Autotag can respect your existing Revit filters. If you've already set up filters for coordination or QA, reuse them here instead of recreating the logic.

- Shows all selection-based filters from your project
- Elements that don't pass the filter are skipped
- Stacks with Element Type and System Type filters
Direction and Length Filters
Geometric filters let you control tagging based on element orientation and size. These are especially useful for linear elements like ducts and pipes.
Element Direction

- Horizontal — Tag only horizontal runs (typical for floor plans)
- Vertical — Tag only vertical risers (useful for sections)
- Both — Tag regardless of orientation (default)
Minimum Element Length

Set a minimum length threshold to avoid tagging very short pipe or duct segments. Elements shorter than this value are skipped entirely.
Interval Tagging
For long runs of duct or pipe, you may want tags placed at regular intervals rather than just once per element.

- Enable Interval Tagging and set a spacing distance (e.g., 15m)
- Tags are placed at each interval along the element's length
- Interacts with Minimum Length—elements shorter than the interval get one tag
- Useful for long corridor runs or vertical risers spanning multiple floors
Dimension Triggers
Dimension Triggers automatically place tags when key properties change along a run. Instead of tagging at fixed intervals, tags appear exactly where the information changes.

Available Triggers
- Change in Length — Tag when the segment length changes (useful for tracking run lengths)
- Change in Diameter — Tag at reducers, expanders, and size transitions
- Slope (optional) — Tag when pipe slope changes

ALL vs ANY Mode
- ALL triggers — A tag is placed only when ALL enabled triggers fire simultaneously
- ANY trigger — A tag is placed when ANY one of the enabled triggers fires
Use ANY mode for comprehensive coverage (tag at every change). Use ALL mode when you only want tags at specific compound transitions.
Combining Filters Effectively
Filters are most powerful when combined. Here are some common patterns:
- Floor plan tagging — Direction: Horizontal + Minimum Length: 1m to skip short vertical drops
- Section/riser tagging — Direction: Vertical + Interval Tagging: 3m for clear vertical coverage
- Size callouts — Dimension Trigger: Change in Diameter only, so tags appear at transitions
- Discipline isolation — System Type filter to tag only Supply Air or only Domestic Cold Water